Our Pre-Trip Inspection Study Guide has everything you need to prepare for the Class A CDL Pre-Trip Inspection Exam. Our study guide will cover the pre-trip inspection terminology as well as a thorough list of all of the parts you will be inspecting on the vehicle. For each part you will be inspecting there will also be a list of items you will be checking for. Our study guide is broken down into the following sections:
The Pre-Trip Inspection is a thorough inspection of the vehicle and all of its major systems. Inspecting the vehicle before driving each day is a Federal requirement and normally takes about 15 minutes. It must be logged in your logbook as "on duty not driving."
You will have to do thorough safety inspections of the coupling system, the vehicle lights, engine compartment, tires and brakes, the chassis, the fuel tanks, and an in-cab inspection.
The following information is a brief summary of Daniel's Complete Pre-Trip Inspection taken from our oustanding free PDF download:
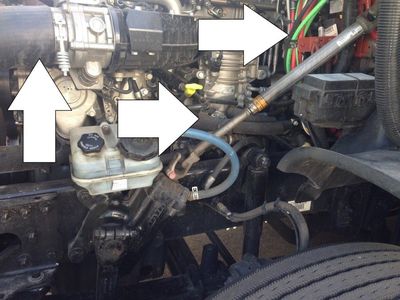
You will be checking the engine compartment for any sort of leaks. You will also be checking to see if all components are properly mounted and secured. None of the mounts must be cracked, bent, or broken.
You will be checking all hoses to make sure they aren't leaking, frayed, or sliced and the fluid levels including the oil level, the coolant, and the power steering fluid.
You must check the components like the water pump, the power steering pump, and the alternator to make sure nothing is leaking, the belts are not frayed, and that everything is properly mounted and secured.
From inside the engine compartment you will also find the steering system, the front suspension system, and the front brake system. All components of these systems must be properly mounted and secured without anything being cracked, bent, or broken. Finally you will be checking the tires, rims, and axle seals to make sure the tires are properly inflated, the rim isn't bent or cracked, and the axle seals are not leaking.
You will be standing along the side of the tractor doing a series of checks on the mirrors, fuel tanks, batteries, exhaust system, and more. You will check to make sure nothing is bent, cracked, broken, or leaking.
Check the mirrors, door hinges, door handle to make sure nothing is cracked, bent, or broken. Check to make sure there is no fuel leaking and that the fuel cap is secured and the gasket is not missing.
Check the exhaust system to make sure nothing is cracked, bent, or broken. Check the driveshaft, cat walk, and steps to make sure nothing is cracked, bent, or broken.
Check the frame and crossmembers for structural integrity. Check the air lines going to the trailer to make sure they're properly connected and that there are no abrasions, bulges, or cuts. Make sure the gaskets are present.
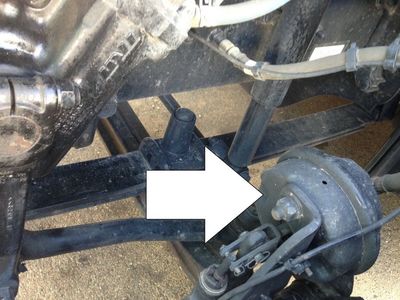
Check the suspension system and brakes on the drive axles, making sure nothing is cracked, bent, or broken. Make sure the brake linings are the proper thickness and that the air bags and properly inflated. Inspect the brake chambers, slack adjusters, and pushrods are properly mounted and secure. Not Cracked, Bent, or Broken. With the brakes released and pulled by hand, the Push Rod should not move more than 1 inch.
Check the rims, tires, and axle seals of the drive tires for proper inflation, no leaks around the seal, and the lugs are all present and secured.
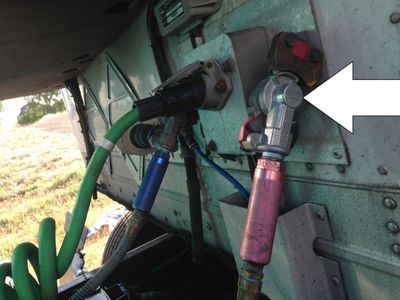
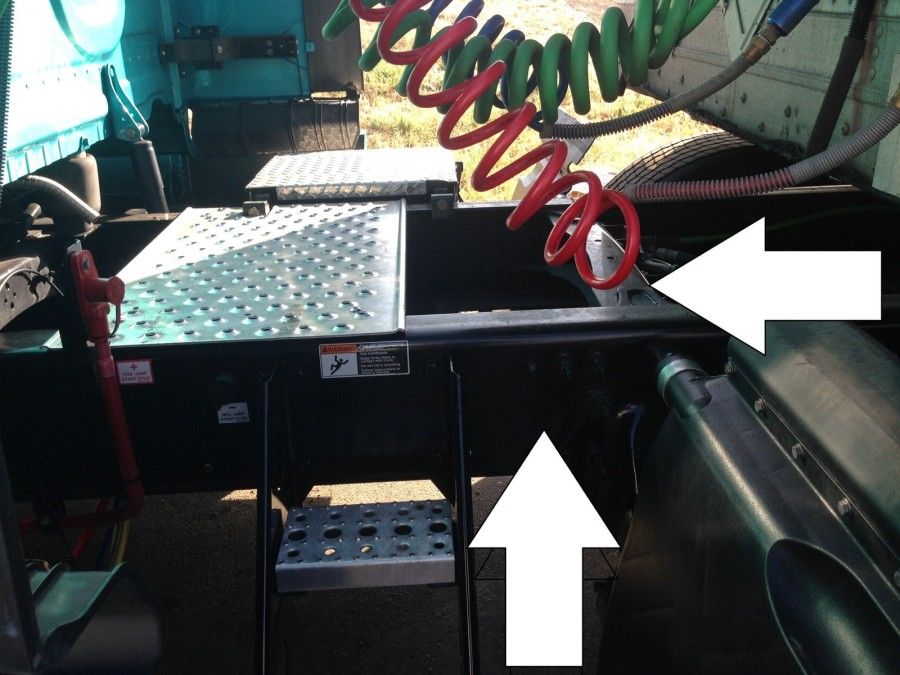
You will be standing where the tractor and trailer are connected and you'll start by checking the electrical line and air lines to make sure they're properly mounted and secure at both ends. No abrasions, bulges or cuts. Not leaking air. Make sure the electrical line has no wires exposed. Check the gladhands to make sure the seals are in good condition, no cracks or signs of dry rotting. Not leaking air.
Check the skid plate of the fifth wheel and the apron of the trailer to make sure there is no debris and nothing is cracked, bent, or broken. Make sure the fifth wheel is properly greased. Also make sure there is no gap in between the fifth wheel and the trailer apron once the tractor and trailer are coupled. Make sure the kingpin of the trailer is properly mounted and not cracked, bent, or broken and that the locking jaws of the fifth wheel are properly secured when the tractor and trailer are coupled.
Check the mounting bolts where the fifth wheel attaches to the tractor frame. Make sure there are no missing bolts and that everything is secured properly. Check the locking pin if you having a sliding fifth wheel to make sure it's properly locked into place.
Make sure that there is the proper clearance space between the tractor mudflap and the trailer landing gear so that they don’t hit each other when making a turn.
You will start inspecting the trailer at the head board, which is the front wall of the trailer. Make sure there are no holes or missing rivets. Check the landing gear to make sure it is properly mounted and secure. Not cracked, bent, or broken. Make sure the fully raised and the handle is secure in the cradle when the tractor and trailer are coupled.
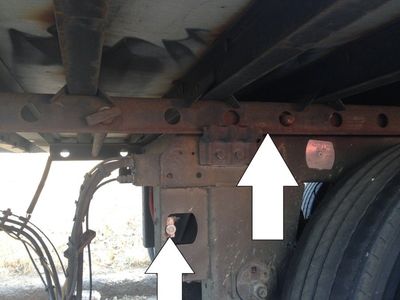
Check the frame and crossmembers under the trailer to make sure they're not cracked, bent, or broken. Check the tandem frame and release pins to make sure the frame is in good condition and the release handle and locking pins are in the fully locked position.
You will check the entire suspension and brake system for the trailer tandems the same way you did for the drive axles of the tractor. You will also make sure the mudflaps are properly secured. For dual tires check to see that there is proper space between the tires and there is nothing stuck between the tires.
Check the rear door and hinges to make sure they are properly mounted and nothing is cracked, bent, or broken. Make sure the door seals are not worn, torn, or dry rotted.
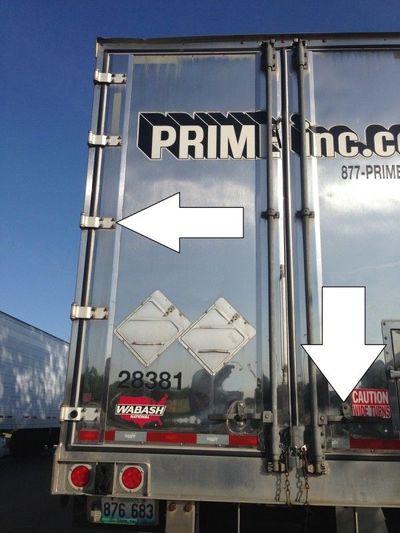
You will be checking all of the lights and reflectors on both the tractor and the trailer. Check the reflectors and reflective tape to make sure they are properly mounted and secure, not cracked, bent, or broken, and clean and illuminated. Check that you have the proper color of amber to the front and sides, and red to the rear.
Start by turning on your marker lights and headlights. Now walk around the entire truck and trailer and point out the lights. Give the function of the light and the location. You should then ask your examiner to help you check your five functions.
While you're sitting in the drivers seat, the examiner will stand to the front of the truck, then behind the trailer. He will then check your Turn Signals, Four Way Flashers and Brake Lights. You must do each function at every location.
The in-cab inspection and air brake check will cover the various gauges and systems inside the cab along with several tests to make sure you air brake system is working properly.
You will start by checking the following:
The air brake test will consist of a leakdown test to make sure your air brakes aren't leaking air and losing pressure. It will also test the warning lights and buzzer to make sure the driver gets the proper warning if the air pressure drops too low.
There are three stages to an Air Brake Test
#1: Applied Pressure Test
#2: Warning Light and Buzzer
#3 Tractor/Trailer Protection Valve Pop Out
Applied Pressure Test: Build the air pressure to governor cut out. Put the truck in the lowest gear. Then turn off the engine Immediately turn the engine back on. Push in both the tractor and trailer valves. (This will release the parking brakes.) Push and hold the Brake pedal fully. Allow the gauges to stabilize. Announce the gauges have stabilized and the Primary and Secondary PSI. With the Brakes fully pressed, you should not lose more than 4 PSI in one minute. Announce that you are listening for air leaks during that minute.
Warning Light and Buzzer Test: Pump down on the Brake pedal until the warning light and buzzer comes on, at or before 60 PSI.
Tractor/Trailer Protection Valve Pop Out Test: Pump down on the brake pedal until both the tractor and trailer protection valves pop out. They should both pop out between 40 and 20 PSI.
We have a ton of Pre-Trip Inspection Practice Questions along with the answers and a complete scoring system in our Free Online CDL Practice Tests:
Our pre-trip inspection checklist covers every part of the truck from front to back, both inside and outside of the truck. It covers the air brakes, suspension parts, steering components, wheels and rims, fuel tanks, batteries, lights, and more. It also covers the air brake tug test and checks for everything under the hood including alternator, water pump, fuel pump, fluids, and more.
This is a super handy checklist to study anytime you have a few minutes to spare:
Jeff from Apex Institute does an in-depth explanation of the entire pre-trip inspection process. This video is loaded with tips that go beyond the CDL test to help drivers really understand how to identify problems.
The Pretrip Inspection Self-Test By CDL College is really unique. It's a silent video which will show you the part you're inspecting and then gives you a few seconds to figure out what you should be checking for before giving you the answer. Definitely check this one out. Great for practicing before the CDL exam.
This is a complete back to front pre-trip inspection of a truck and trailer by Averitt mainentance associate Kevin Breeding. This thorough pre-trip inspection covers all inportant points of inside the cab, lights, engine, the tractor itself and the trailer.
We have included two print versions of the pre-trip inspection process from Daniel. The first is the entire pre-trip inspection and the second is an abbreviated checklist for the inspection.


We have an awesome set of tools that will help you understand the trucking industry and prepare for a great start to your trucking career. Not only that, but everything we offer here at TruckingTruth is 100% free - no strings attached! Sign up now and get instant access to our member's section: