
In this article, I talk about how to setup a Hikvision DVR so you can have your surveillance system up and running fast. Just keep reading.
Setup a Hikvision DVR for basic recording and monitoring is usually a quick task that doesn't take more than 10 minutes, assuming you already have your cameras installed and connected to the DVR. Let's discuss the configuration.
==> I'm assuming you already know what a DVRs is, but just in case you want to learn more read the article: Digital Video Recorder for CCTV.
Before setup the DVR to start recording your cameras, it's necessary to have a Hard Disc Drive (HDD) installed. Take a look at the following picture.
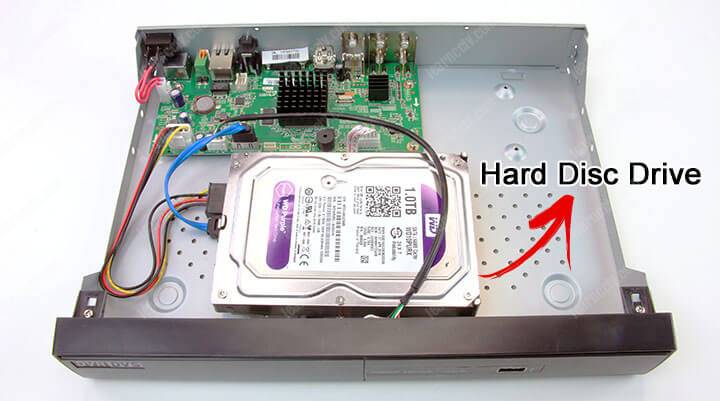
You just need to open the recorder to physically install the HDD and connect the power and data cables. It's an easy process that doesn't require technical skills.
==> To make sure your HDD storage capacity is enough for, I highly recommend you to read the article: Bandwidth and storage for CCTV to better understand what are the factors that should be considered and I also recommend reading the article: CCTV Storage Calculation.
IMPORTANT: You must use a Surveillance Hard Drive that is designed to work with recorders. I recommend Discs from Seagate and Western Digital.
OK, you should have all your analog cameras installed and connected to the DVR as shown in the next picture, just make sure you are using good coaxial cables and connectors and the DVR is connected to a monitor via the HDMI or VGA output.
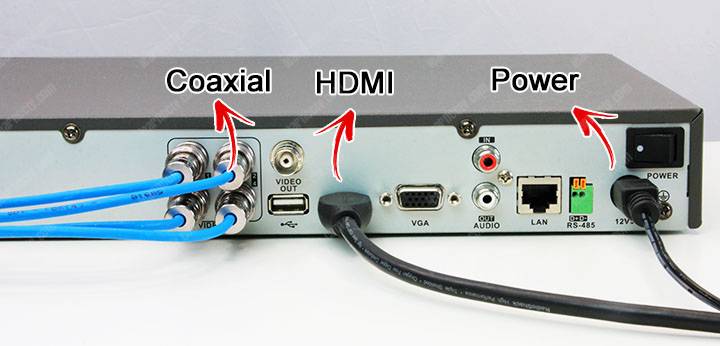
That's the minimum you must have to have your Hikvision DVR up and running locally. As you can see in the picture an HDMI cable is being used but you could also use a VGA monitor, although it's not recommended anymore.
After installing the HDD and connecting the cables, it's time to setup your Hikvision DVR. All the configuration is done by using a mouse that can control a menu in the monitor screen. Make sure you have a USB mouse connected.
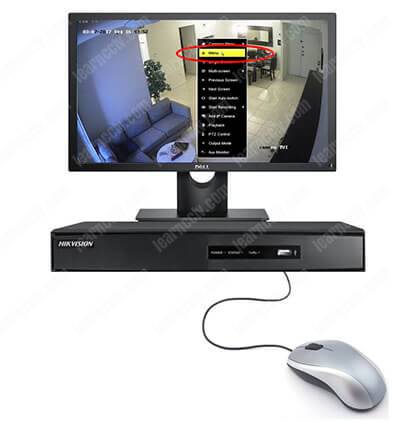
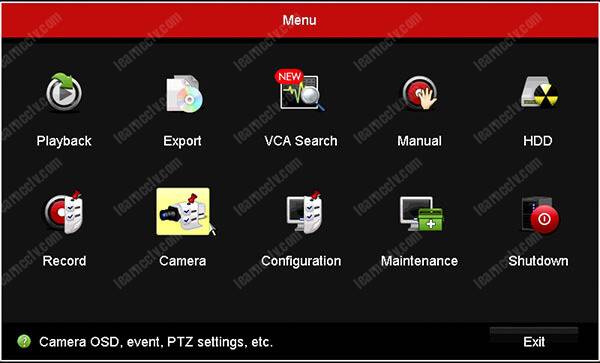
The first thing you need to do is to make sure the HDD is correctly installed. Just click the screen with the mouse right button and choose "Menu".

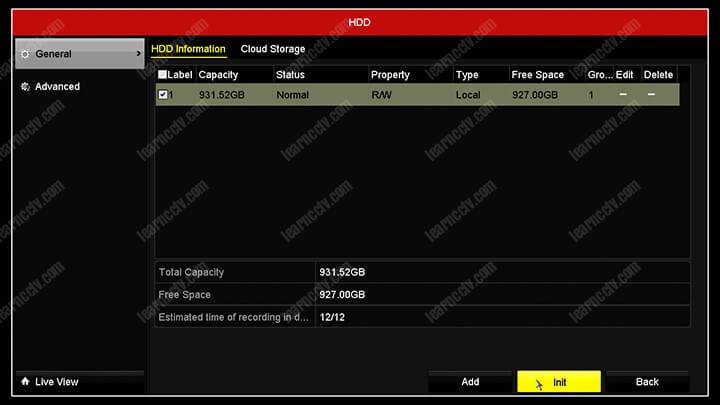
Click the HDD button to open the Hard Disc Drive configuration.
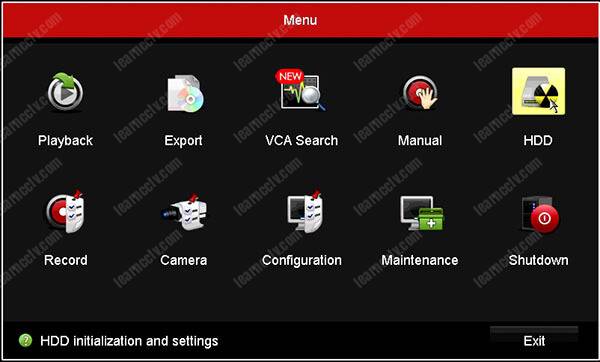
The HDD should appear in the menu. You need to format it to make sure it's ready for the footage recording. Select the checkbox and click "Init".
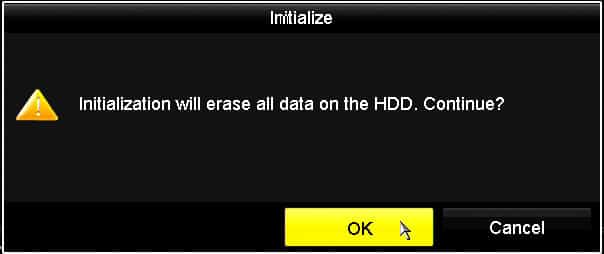
A message is displayed on the screen to let you know that all the data will be erased from the HDD. You just need to click "OK" to proceed.
The DVR formats the HDD and everything is ready for recording.

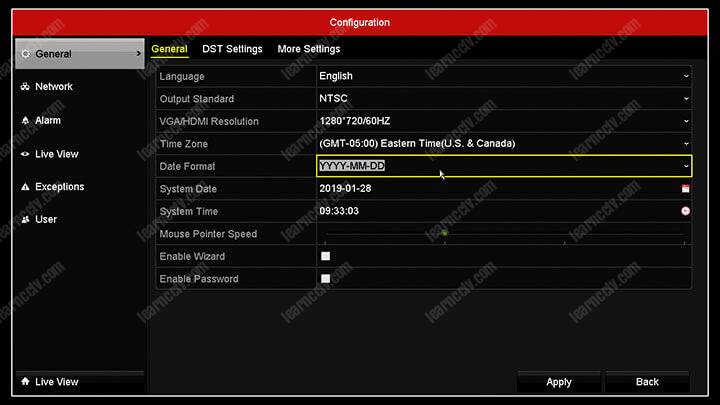
Your Hikvision DVR is ready for recording, but you don't want to have the wrong date and time in your footage, right ? So you MUST configure the date and time.
This is a simple process, just open the configuration menu.

Select the correct date format and adjust the date and time.
Now your Hikvision DVR can record all the cameras with the correct date and time so you can search for the footage when something happens 😉
It's important to configure the cameras to make sure they are connected to the correct channel and also to have the best possible quality.
The Hikvision DVR allows you to setup each camera individually for:
- The technology it's using such as HD-TVI, HT-CVI, AHD, CVBS or IP;
- The information that is being displayed on the screen (On Screen Display);
- Brightness, Saturation, Contrast, Hue, Sharpness, and Denoising.
- PTZ control and motion detection.
There are more options available but they are not the focus of this article due to the fact that I want to cover only the essential things you have to setup to have your Hikvsion DVR ready for footage recording.
==> To learn more about the different types of cameras technology, please read the article: HD-TVI, HD-CVI, and AHD comparison. You can also learn more about the PTZ camera in the article: What is a PTZ camera.
Well, let's take a look at the camera configuration, open the camera menu.
Select the type of technology your cameras are using, as described above, the options are TVI, AHD, CVBS or IP cameras (for this DVR model).
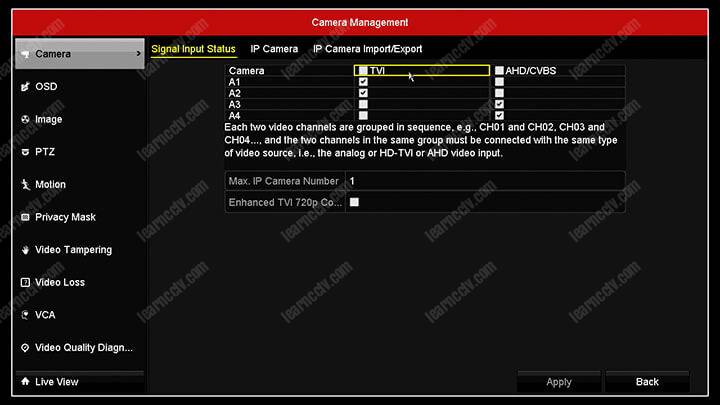
If you are using Hikvision cameras the default technology is HD-TVI, for Samsung cameras the default technology is AHD, other low-resolution cameras are CVBS.
Make sure which technology your cameras use and check the boxes.
The next step is to configure the OSD (On Screen Display) which shows some information such as date/time and camera name on the screen.
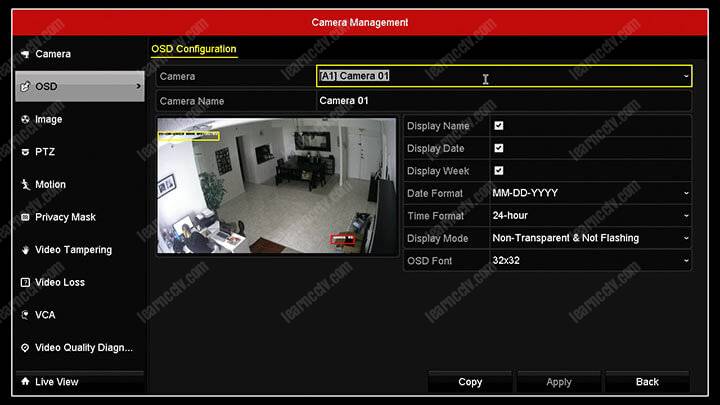
The setup is very simple, just select the cameras and check the information you want to display on the screen and change the camera name.
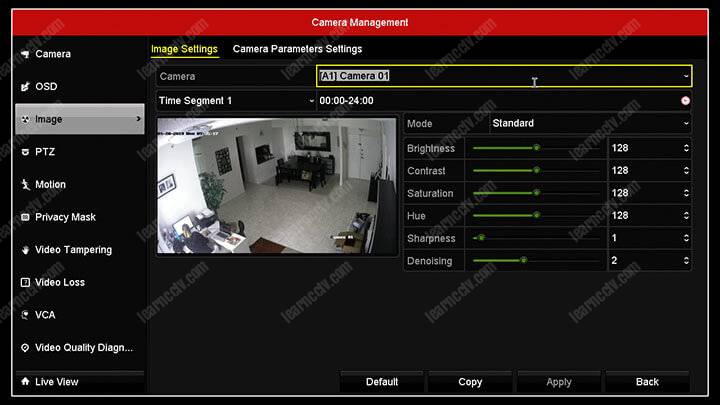
In the "Image" menu you can adjust the camera Brightness, Saturation, Contrast, Hue, Sharpness, and Denoising to obtain a better image quality,
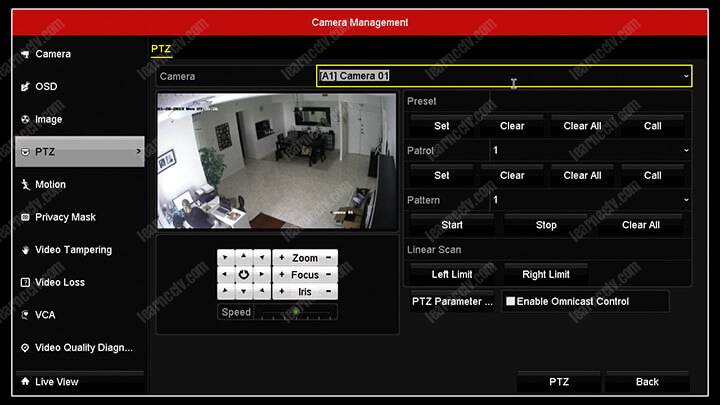
If you are using a PTZ (Pan Tilt Zoom) cameras, just open the menu to set the parameters you need. Otherwise, just ignore this menu.
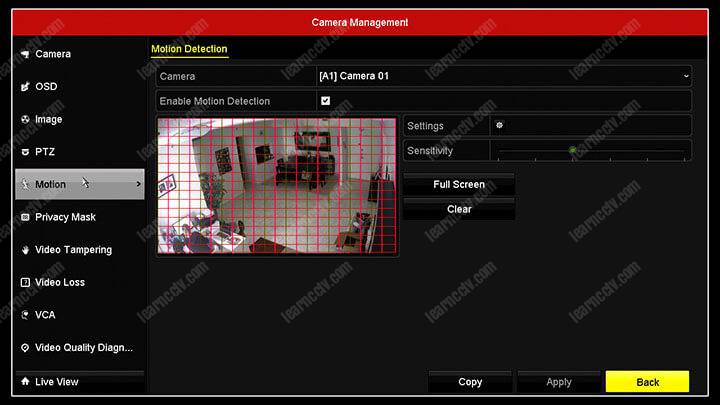
And finally, open the "Motion" menu to setup the camera motion detection.
Hikvision DVRs can analyze the image that is coming from the camera to check if there are movements in the scenario. You can adjust the area that you want the motion to be detected as adjust other parameters such as sensitivity,
These are the fundamental things you need to setup, you can check the other ones if you want to, but right now let's move to the next step. the recording.
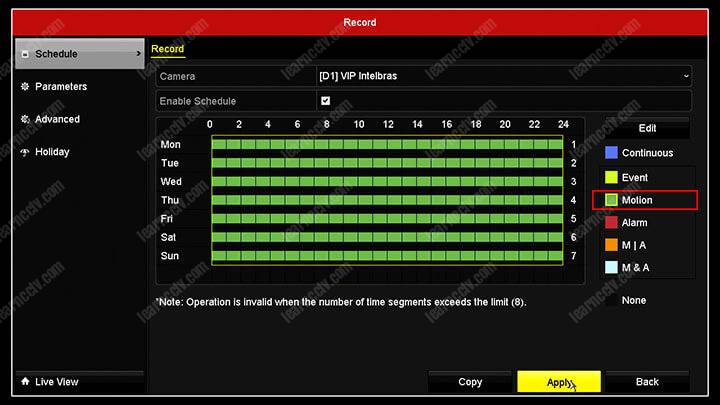
The Hikvision DVR recording setup is very simple, you just need to select the cameras and choose how you want to have them recorded.
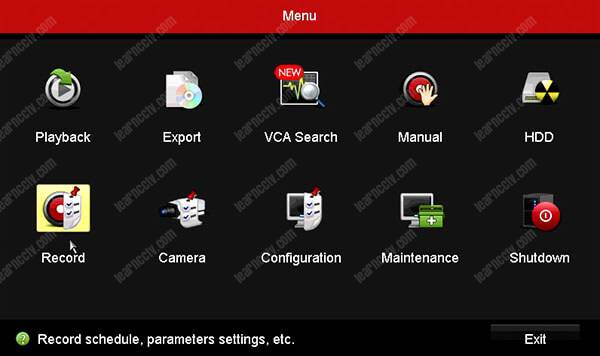
Click the record button to open the recording setup screen.
You can select continuous or motion recording among other options, select motion to have the video from the camera recorded only when there are movements in front of the camera, this can save you space in the hard drive.
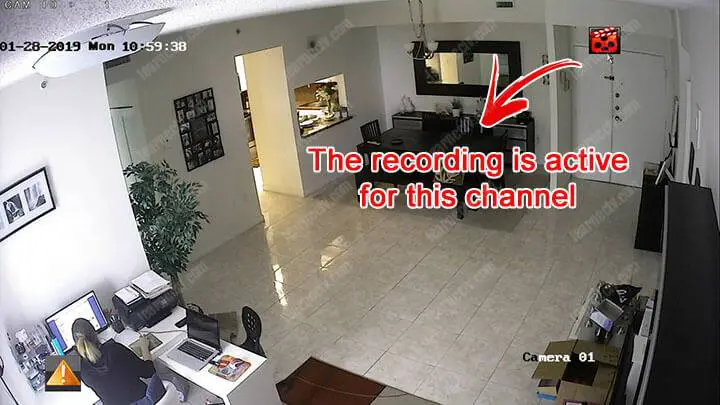
Remember to setup the camera motion as you saw in the previous step, otherwise, the camera won't be recorded. You can see when the camera is being recorded by the icon that is displayed on the screen.
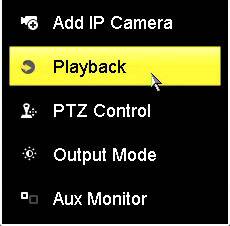
If the Setup for your Hikvision DVR is correct, you should be able to playback the recorded videos. Just right click the screen and choose "Playback".
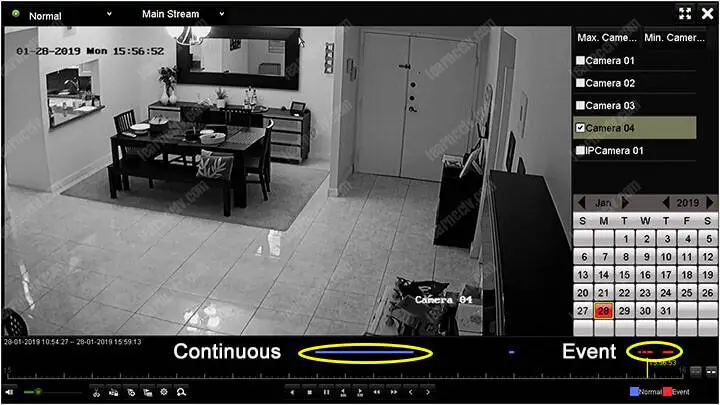
In the playback menu, you can choose the camera, date and time you want to playback. You can see the colors indicating the continuous or event recording.
OK, that's the basis for a Hikvision DVR setup. This information is enough to configure a system and let it up and running, but is essential to understand more about advanced and remote configuration to access the DVR via the Internet.
I highly recommend you to read the following articles: